Whiz, bang what a title — Vistitle VisTitle 2.5 Review
Date: 2014-5-12
Im massively impressed with my Edius system from DVC – head over heels in love with it to be more precise. Its as steady and reliable as you can get and does 99% of what I want to do in a quick and logical way. However, the one thing that always fills me with envy is seeing some of the more sexy things other producers seem to be able to do, with ease, with their titles and graphic effects. Edius basic QuickTitler is just that, pretty basic.
Towards the end of last year I came to the conclusion that I really had to start getting my head around Adobe After Effects as it seemed to be the program of choice for the videographers whose work had inspired me. Id flirted with it for many years previously, in various editions, but it simply wouldnt stick in my head. Unless Im using a program day-in day-out it doesnt take long for me to have to re-learn basics in order to get results out in a reasonable amount of time.
Determined to get going with After Effects I signed up for the Adobe Creative Suite free months trial and set myself a challenge. If I could get to the stage of being able to quickly knock up attractive lower-thirds caption backs and animated title sequences within the free trial period Id take out one of Adobes subscriptions. I failed miserably. After Effects simply doesnt fit in my head – and I doubt Im the only one to have come to this conclusion.
At that point I had accepted the fact that if I ever wanted anything more than I can currently do using Edius (and a bit of Photoshopping) Id probably be hiring those services in. Either that or maybe it was time for me to start looking elsewhere.
My route to Vistitle 2.5
It was shortly after my final After Effects experience that David Clarke of DVC approached me about reviewing the latest edition of Vistitle (2.5). When I originally ordered my edit suite from them theyd bundled it up within the quote but it had been one of the cutbacks I had to make in order to get the system that I thought I wanted. Whilst I thought I knew what Vistitle was and how it might help me, I didnt really fully appreciate how Id grow to need and want it.
Even though Vistitle was very popular within the Edius community (integrating neatly with it from very early editions) at that time it all seemed a little too template driven to me – and the examples Iv seen produced with it left me a little cold. I really should have given it a go back then as I think Ive been missing a real gem. What is it they say about hindsight?
With its close integration with Edius, Vistitle hasnt really gained much take up outside of that community. Thats very understandable, especially in a marketplace where you have such a strong standalone product as After Effects and its complete integration with Premiere. But Vistitle 2.5 has changed all that as it now integrates neatly with Avid and Premiere too giving a really powerful alternative for many more PC-based editors looking for a little more than their NLEs basic titling package can offer.
The full review pack sent to me by DVC included the five additional plug-ins and retails for around 250 pound inc. VAT. Theres upgrade paths too for those with earlier versions of the software plus you can also buy the plug-ins separately to keep your initial investment low.
What is Vistitle 2.5
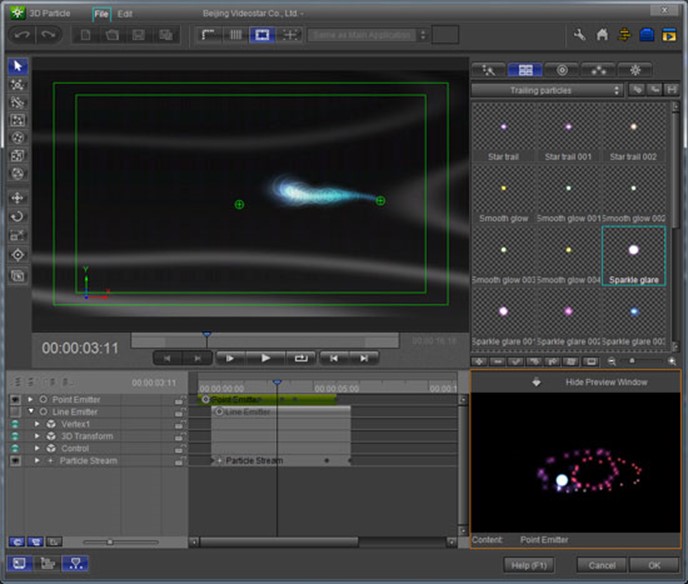
In a nutshell, Vistitle is a PC-based title effects/animation software package. It enables users to quickly create complex, multi-layered 2D/3D animations of text and objects – applying textures, depth, glows, sparkles and lighting effects. It also enables you to quickly add dynamic graphic backgrounds for text and graphics, and with the optional plug-in packs provides particle effects, handwriting animations, 3D charts, converts 2D paths to 3D and there? also a dedicated Karaoke plug-in should you need it.
Edius users will find the layout, menus and controls very familiar – mainly because it was specifically developed to address that NLEs titling shortcomings. Whilst Avid and Premiere users might be daunted with this prospect I can only urge you to give it a go (theres a watermarked demo you can download here –
VisTitle 2.5 Full Installer). Ive played with most NLE packages in my time and I think that Edius is, by far, the most intuitive and easiest to pick up. Vistitle follows that example.
The minimum spec for the PC is an Intel CPU with 3GHz processor or faster (Intel i5 or i7 is recommended). Youll need a Direct3D 9.0c or later supported graphics card, at least 2GB of RAM (4GB if you are running Edius 7) and at least 4GB of storage space for the installation. Youll also need a spare USB port to connect the USB dongle – and your system must first have either Edius, Avid or Premiere installed.
Vistitle utilises the graphics card to render in real-time – so the better card, processor and RAM you have the better performance youll achieve. But even with a minimum specification system youll be able to work at full HD and render out complex text and graphic animations – which it does comparatively quickly.
Learning Vistitle
YouTube is awash with free tutorials about After Effects, along with books and online resources aimed at beginners and advance users alike. Thats no surprise when you consider the size of the user base and the complexity of the program. Despite accessing many of these resources by the time Id reached the end of my months trial I was still an After Effects stumbling fool.
Vistitle tutorials on the other hand are sparse – but thankfully most are well thought out and, mores the point, easy to follow. The program comes with the usual PDF user manual but, in addition, you also get a set of mute video tutorials covering most of the programs features. DVC have also got an excellent collection of beginner tutorials on their website which is where I started and they got me up and running in no time. Theres also a range of more advanced tutorials on DivideByeZeros YouTube channel which Im presently working my way through – plus theres a new set of paid-for tutorials at http://sgdvtutorials.com/ (which will be available through DVC) but Ive not looked at these at all yet.
The end result for me was that by the end of the first day Id got my head around basic navigation and controls of the program and had output a rudimentary title with an animation. By the end of a month of using it Im far from being expert but I am at the stage where Im choosing to use Vistitle more often that Edius-own QuickTitle.
Vistitle Interface & Workflow
I understand that there are some differences to workflow between using Vistitle with other NLEs, so anything talked about here is purely relating to using it alongside Edius. Outside of your NLE youll be working within the main Vistitle interface, but once used inside your NLE youll be accessing it in a number of ways.
Adding a Vistitle is a simple as clicking on the “T” (add title) button in Edius, which will launch you straight into the main interface. Once youve created a Vistitle, double-clicking it on your timeline will first take you into the Vistitle Mini interface. In here you can simply and easily adjust the text content of your title (the actual words, font, weight, kerning, layer ordering etc) without the need to go into the full interface. Thats a smart feature and is great for quickly editing and adding captions of a similar design. For instance, once you have created the look and feel of your captions, added lighting effects and swirling backdrops, logos and particle effects, all you have to do to create another matching caption is to open the first in Vistitle Mini, change the text and then “save as” with a different name.
If you want to change the Vistitle in more detail, such as amending the animation or altering light effects and colours, then you need to click on the button to take you to the full interface from within Vistitle Mini.
Whilst theres definitely a link to Edius in Vistitles layout it is not going to seem too alien to an After Effects user. Theres a timeline, a preview window and a properties/control box for editing the currently-selected object.
The preview window is switchable between the main title graphic design and its effect view which includes the selected objects animation path. Dividing the views up like this gives you a very uncluttered and easy-to-work-with view of your title and the objects within it.
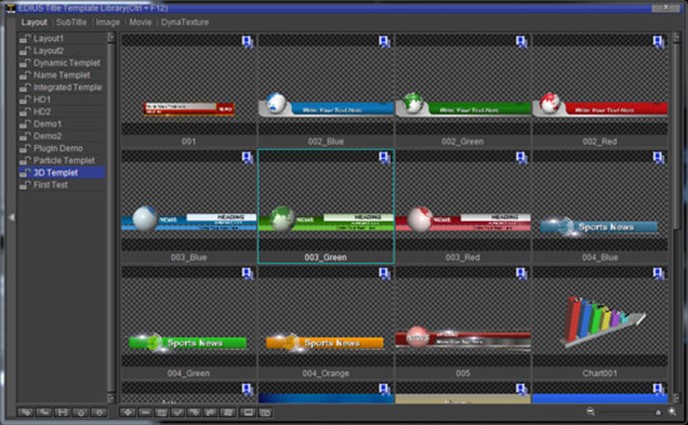
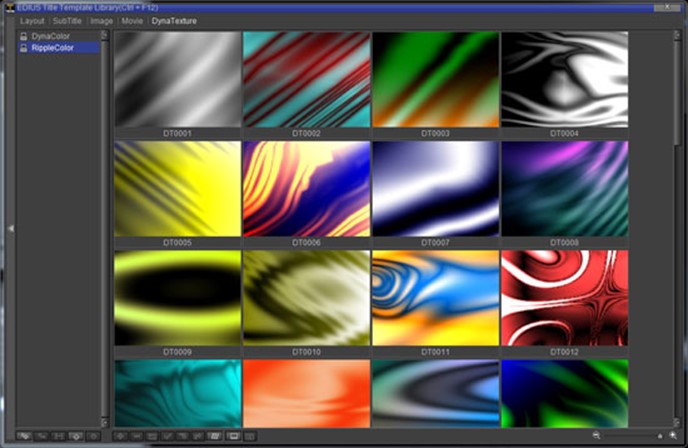
The timeline area will also appear very familiar to NLE and effects package users with each object having an expandable view for controlling transformations, effects, in & out points and key frames. This window can also be switched to reveal a template library of graphic elements, backgrounds, sub-titles, multi-layered particle effects captions, 3D objects etc.- for you to easily and quickly add to your design and customise as you see fit.
For really quick application you can also call up a template design to drag and drop straight on to your Edius timeline. Once installed Vistitle will add an item to your “tools – menu” in Edius, called Edius Title Template Library. The library consists of a variety of pre-constructed Layouts, Sub-titles, Images, Movies and DynaTextures.
Layouts include a vast range of lower-third captions, full-screen graphic designs with 3D objects and other demonstration templates which show off all the capabilities of Vistitle. Just drag one to your timeline, double-click to change the text content in Vistitle Mini – or completely change its properties within the full Vistitle interface and then save them. You can also import any previously designed Vistitle projects into this library for quick deployment.
Many of these templates are cheesy – but the point of them is they get you started quickly – and in opening them up and starting to tweak them to your own design is a great way to learn how to create your own Vistitles from scratch.
The Sub-title templates work in a similar way. These give you a range of single lines of text which you can add to your timeline as sub-titles – at timed intervals. Simply drag and drop the subtitle on to your Edius timeline, stretch it out over the video section that you want to sub-title, double-click and then start adding the titles line-by-line and place exactly over the right section of video.
The Image library contains both static images and static graphical elements – which again can be just dragged onto your timeline. You can also import your own TGA, PSD, BMP, JPG, GIF, EMF, WMF, TIF, PNG and ICO images to this library for easy deployment to your timeline.
The Movie library contains a handy set of animated icons and graphics in .VXMOVIE format. This includes spinning globes, explosions and other more obscure objects which can be dragged and dropped onto your timeline. Unfortunately you cant import normal video files into this such as AVIs or MOVs – but why would you want to? However, if you have an animation created in another program, and can export that out as an image sequence, you can then import these into a separate utility program that comes with Vistitle called VxMvMaker. This gives you the option to output your image sequence in various video formats – including .VXMOVIE.
The final section in the library contains DynaTextures (Dynamic Textures). This wide selection of swirling masses of colours and shapes are ideal for creating backdrops for titles or video. You simply drag them on to your timeline and then stretch them out to the required time length and they automatically animate over that period. You can then of course alter the qualities of these within Edius-own effects and image adjustments. Ive used these plenty of times already.
My first Vistitle project
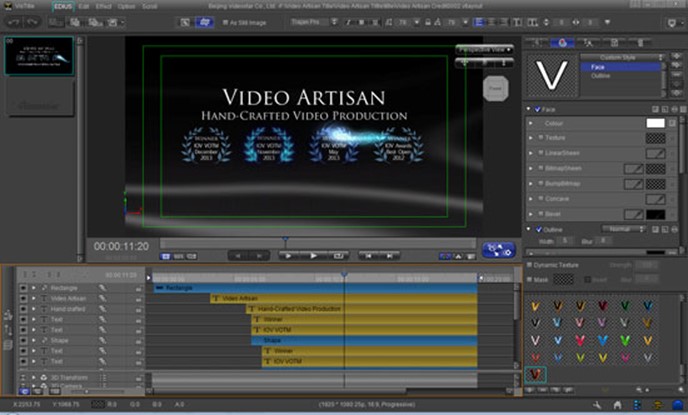
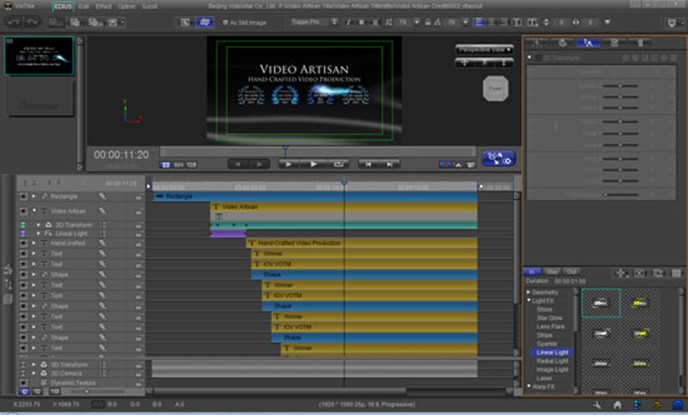
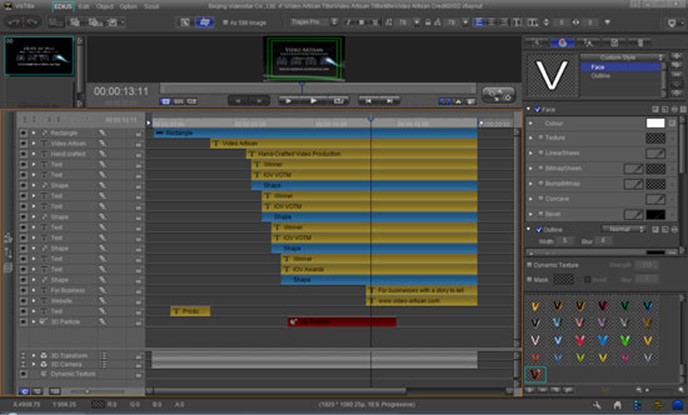
With my head pretty much around the program I set about creating my first Vistitle project from scratch. Ive wanted to create a suitable video ident or credit for Video Artisan for a while now and its the kind of project that Vistitle was created for. News also came in around that time of my entry winning the IOVs Video of the Month competition so I thought it would also give me an opportunity to shout about that too. The end result can be seen here – https://vimeo.com/84389859
Im not saying the end result is an amazing, multi-layered marvel that demonstrates everything that Vistitle can do – but it works for me. It does however utilise lighting, animation and particle effects – and the very, very useful DynaTextures. The award wreath is a PNG file with transparent background and was imported as an image into Vistitle. After deselecting the ?lways Use Image Colour as Face Colour- option I was able to apply colour, lighting, texture and depth effects to these objects and easily time the glows to coincide with the passing of the 3D particle effect underneath.
Since then Ive gone on to use Vistitle in a couple of real, paid-for, projects. The most recent is the short doc on the M&IT Agency Challenge which was filmed at the Landmark Hotel, London (https://vimeo.com/85261908). Ive mentioned this project as its typical of how Ill be using Vistitle going forward. The only Vistitles in this are the interviewee caption backs (the first comes in at 1 30″) which have a very subtle 3D particle effect in the background just to help the text stand out.
Final thoughts
Whilst the additional plug-ins do add to the overall cost of ownership I think they are vitally important addition – if only for the 3D Particle Effects. The Handwriting plug-in is also really nice to have in your arsenal as one day you will be asked if you can do this. Not only can you use it to reveal text as if its being written on the screen but you can also do the same with objects and images. 3D Charts are also something that your clients will just expect you to be able to do, so again another useful tool to have in your box. I have to admit that Ive not spent much time playing with the 2D path to 3D plug-in (enabling you to extrude 2D objects to 3D and add textures, light paths etc), and I cant imagine me ever using the Karaoke plug-in but suspect theres a market where this too would prove to be very handy.
I guess that its a good sign that Ive not found much at all to moan about with Vistitle so far. The only thing that had me stumped for a while is that in the full interface, by default, the project layers are displayed back to front – with the top layer being at the bottom! However David at DVC pointed out that if you right-click in the timeline area and select, “track layer matched with object layer” it puts them the sensible way round.
Like all whiz-bang effects you have to learn to use title and graphics effects in moderation. They are never a substitute for good basic cameracraft, editing and storytelling. I would even go as far as saying that if you notice them then youve probably overdone them. You must also keep in mind that every minute spent creating a nice title and graphic is costing you or your client money. Even with its simplicity and ease of use, Vistitle will absorb a lot of time in designing, tweaking and rendering out graphics – all of which adds to the productions budget. Therefore you?l need to always ask yourself if the film really needs it and whether your client is prepared to pay for the work involved. My own Video Artisan credit piece took about a day to create including aborted designs and fiddling about with the animations and lighting effects.
The big question is, is Vistitle a direct replacement for After Effects? I guess the simple answer to that is “no” – but only because of After Effects many years of development and take-up within the creative industries. But for anyone who is starting from scratch or looking for a much simpler and more intuitive title effects package that you can get your head around in a much more reasonable amount of time, then Vistitle is a much better solution. With the introduction of version 2.5 and its integration with Avid and Premiere I can see the user base expanding quite rapidly – and with that I can see Vistitle being developed and improved even further.
Vistitle – a serious alternative to the obvious!
Kevin Cook F.Inst.V.